What's Included In Regular Air Conditioner Maintenance?

When it comes to air conditioner maintenance, you can do several essential things regularly to help extend the life of your HVAC unit and ensure it is operating as efficiently as possible. When's the last time you had your furnace or air conditioner checked? What about cleaning? If it's been a while – or never – these easy steps will help jump-start your system into tip-top shape!
The guidelines that follow will apply whether you have central air conditioning or a window unit. It doesn't matter what kind of heating and cooling equipment you have; these tips for maintaining it benefit both types of systems.
Keep In Mind That…
As with any appliance, regular maintenance will help extend the life of your heating and cooling system.
Furnaces and air conditioners can become a home's most significant energy users. By keeping it in good working order, you're reducing how much it has to work to keep your home comfortable during hot or cold weather.
You might want professional help for severe problems with your furnace or air conditioner. If there is a persistent problem with one of these appliances, call an experienced service technician rather than solve the problem yourself. In many cases, you'll save time and money by dealing directly with someone who knows what needs to be done to get the job done right quickly.
Before You Start…
Ensure that no one is in danger of being harmed by the repair.
Air Conditioner: Turn off and unplug your air conditioner and remove and store any furniture and other objects on top of it to prevent them from falling. Furnace: Make sure your furnace is turned off at the circuit breaker before you begin work on it so that you do not accidentally turn it back on while working.
This information can help if you're dealing with a life-threatening emergency such as carbon monoxide poisoning, but otherwise, call a professional rather than tackle problems yourself. You can find HVAC contractors near you in our directory.
Step 1 – Check the Exterior Components of The System OUTSIDE OF YOUR HOME:
Check around your home's foundation for signs of water damage. If there are any signs of leaks, you'll need to have your system evaluated. Check the exterior components of your system, including the compressor and condenser. Look for missing or fallen fins on the unit's coil that absorbs heat from inside your home. This fin damage is a sign of corrosion. When inspecting this part of your system, be sure to check around all sides and underneath it as well.
Step 2 – Inspect, Clean or Replace Your Air Filters Once a Month
Both air conditioning and heating systems use air filters to keep dust, allergens, pet dander and other particles out of equipment so they don't build up inside where they could affect your indoor air quality. In addition, if these items become too heavy to stay airborne, they can get pulled back down into the system and get caught in the coils. In many cases, this will cause your equipment to stop working correctly or fail altogether.
Air conditioner filters collect a lot of dust and dirt over time, so it's essential to check their condition regularly. The filter needs to be clean enough that you can see the light through it when held up against a light source. You should change your air conditioning filter once a month during hot months and twice a month during cooler periods.
In addition to checking your air conditioning filter monthly, make sure you have an adequate number of HVAC filters for your home. If you don't have one installed yet, use our guide to help determine how many filters you'll need.
Suppose your home's air conditioner filter is dirty; clean or replace it before running your system. Otherwise, the extra strain on the fan motor could cause its bearings to fail. If this happens, it will be more costly to repair than simply replacing a dirty filter and paying an initial service call fee.
Step 3 – Lubricate Your System Regularly
It's important to lubricate various parts of your heating and cooling equipment so that they operate smoothly and efficiently throughout their life span. It would be best if you did this once a year after cleaning or replacing your furnace blower belt. Use high-quality lubricant specifically for HVAC equipment to keep moving parts working well, which also helps prevent corrosion from building up in your system.
Step 4 – Examine the Ductwork and Check Your Air Pressure Every Year
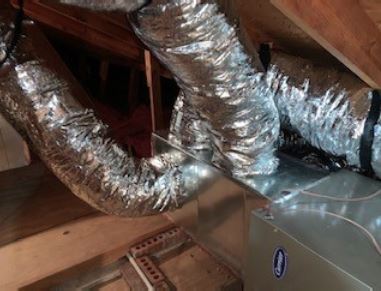
The HVAC ducts in your home can become clogged with dust, pet dander, debris and other items that the air filter should filter out. When this happens, it affects your indoor air quality, which can cause allergy symptoms to flare up or exacerbate existing conditions. It may also cause problems with the cold air blowing out of vents. If cold air won't blow out of a vent properly when you turn on your system's thermostat, check for blockages in the ductwork near that register and clear them if necessary.
Problematic ducts can also lead to poor system efficiency, meaning not only will your system have to work hard to keep your home cool, but it will also increase your monthly utility bill. If you find blockages in the ducts or the system struggling to keep your home comfortable, call an HVAC professional and ask about having them repaired.
If you use window units, check the air pressure regularly by pressing against one corner of a frame while another person turns on the system. This way, you can get an idea of how much force it takes for air to get through the registers and into the rest of your house.
Step 5 – Inspect Your System During Cold Weather
During cold weather months, check any return-air vents that blow warm air into other parts of your house for signs of condensation and ice build-up. This could be an indication that you need to have your ducts repaired.


